Showing posts with label Bento. Show all posts

January 28, 2018

Couscous Lunch Boxes - Lazy Lunch Prep


One Cup of Couscous = 4 lunch boxes.

I admire the folks who assemble beautiful identical lunch boxes on the Sunday evening to set them up for the first four (or five) days of their work week. This doesn't really suit me for a few reasons. One, I'm not inclined to eat the exact same thing every day, no matter how delicious, and two, even if I were so inclined, our tiny German fridge simply doesn't have room for this many packed lunches at any given time - even for one person, let alone two. I also try to use up any cooked meats within three days of cooking (unless it's going into the freezer). My packed lunches need to be cold or room temperature, as I do not have access to a microwave or stove at work.

In the spirit of planning a bit ahead and also using up foods already on hand or leftover from the previous night's dinner (not to mention avoiding the canteen at work), I had the idea that I could prepare a base of flavourful couscous on Sunday night, and then portion it out over the following four days. While you'll see a certain amount of repetition in the ingredients, each box was different enough from its predecessor to feel like a completely different meal.

I started by making my standard fluffy couscous base, which takes about 5 minutes active time, plus 15 minutes inactive:

Couscous Base

1 cup dry couscous
1.25 cups boiling water
1/2 teaspoon coarse salt, divided
2 tablespoons fresh lemon juice
2 tablespoons olive oil
1/2 teaspoon paprika powder (check that it's not stale)

In a large container (preferably one with a tight-fitting lid), add the dry couscous, half the salt, and the paprika. In a small bowl, stir together the lemon juice, olive oil, and the other half of the salt. Basically, you're making a vinaigrette of sorts. Stir it well until it emulsifies, for the best effect. Pour the vinaigrette over the couscous, and stir quickly with a fork until every grain is coated with the lemony oil mixture. Add the boiling water and stir quickly to distribute the grains of couscous evenly, and then cover tightly. Wait for 15 - 20 minutes, remove the lid, and marvel at how easily the couscous grains fluff up when you stir them with a fork. Let the couscous cool, and store in a sealed refrigerator container.

Lunch Box #1 - Monday

Couscous, baked chicken thigh (curry seasoning), finely diced cucumber, tomato, yellow bell pepper, and spiced sweet potato coins with a bit of sliced green onion.

The chicken and sweet potato were leftovers from Sunday dinner. The bone and skin were removed from the chicken. You can't actually see the bottom layer of couscous, but it's definitely there!


Lunch Box #2 - Tuesday

Couscous, Berbere-spiced chickpeas, diced tomatoes, diced cucumber, crumbled feta, sliced avocado.

In the morning, I opened a tin of chickpeas and extracted half of them. The rest were transferred to a refrigerator container, along with their liquid. I rinsed the chickpeas, and then quickly sauteed them in 1/2 teaspoon olive oil and a 1/2 teaspoon of Berbere spice mixture. I spread out the couscous in the bottom of the box, and scraped the seasoned chickpeas into one side before filling in the rest of the ingredients. I let the box cool before closing and stashing in my work bag.


Lunch Box #3 - Wednesday

Couscous, boiled egg, diced yellow bell pepper, avocado, and spiced sweet potato coins.

The egg was boiled up the night before and stashed in the fridge overnight. In the morning, I peeled it quickly with a spoon, and cut it before putting it in the box. The spiced sweet potatoes are continued use of leftovers from Sunday's dinner. You can actually see the bed of couscous in this one!

This box was full of delicious things, but in combination it was a bit dry. A bit of sauce or dressing would have made a big difference, which I will keep in mind going forward.


Lunch Box #4 - Thursday 

Couscous, Caribbean-curry-spiced chickpeas, finely diced cucumber, yellow bell pepper, crumbled feta, spiced sweet potato coins with sliced green onions, and diced dried apricots.

These chickpeas were done quickly in the morning, using the other half of the can of chickpeas I'd opened on Tuesday, and opting for a spicy Caribbean curry powder for the seasoning. The other items we've seen in previous boxes, but the one special ingredient here was the diced dried apricots which lent a wonderful fruity sweetness that went very well with the curried chickpeas. The inclusion of the apricots made this final box feel a bit special.


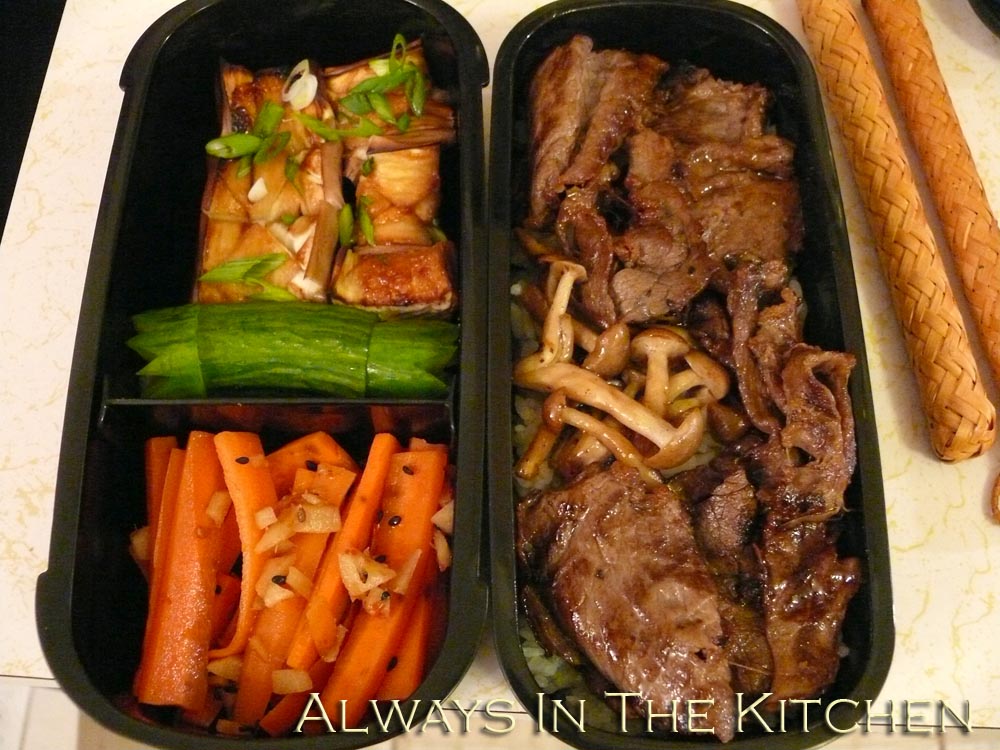
By Friday, I was ready for something entirely different, and had a homemade bento with Japanese rolled omelette with yakionigiri and gingered carrot coleslaw. But that's another type of lunch, for a different type of post.

This was not a completely effortless scenario - each day I had a couple of small tasks to pull the day's box together - but having the couscous waiting for me did inspire me to make good use of my leftovers, to vary my ingredients, and motivated me to actually do it.


October 03, 2016

Gingered Plum Crisp


Apple Crisp is one of my favourite homemade desserts. It's good enough to serve to company, yet still relaxed enough for any casual supper. Even better, if there is any leftover, you can easily enjoy it the next day for breakfast. Fruit, oats, right? Practically health food.

This is not Apple Crisp, of course, but it follows the same principles of preparation: pile your fruit into a baking dish, sprinkle with sugar, add a crumbly layer of oat streusel, and bake. The biggest difference between this and my Apple Crisp, in fact, aside from the use of plums instead of apples, is the spicing. Oh, and this one's vegan. Don't worry, though, you can always replace the coconut oil with butter, if that's how you roll. The coconut oil gives it a delicately tropical note that is very pleasant with the ginger and the plums. You could also accentuate that aspect by adding a tablespoon of grated unsweetened coconut to the oat mixture.

I made one larger baking dish (16-centimetre round baking dish, not pictured), and these two little gem-sized (perfect for bento, might I add) to take to work to share with a colleague. I forgot to take any pictures of the larger one, but here are the little bitty ones.

Gingered Plum Crisp

Fruit Layer
500 grams prune plums
1 tablespoon raw sugar
1 inch fresh ginger root, coarsley grated

Crisp Layer
1/2 cup all-purpose flour
1/2 cup rolled oats
1/2 cup raw sugar
1/4 teaspoon kosher salt
1 teaspoon ground ginger
1/2 teaspoon ground coriander seed
3 tablespoons solid-state coconut oil

Wash the plums and slice them in halves to remove the pits. Chop them into small bite-sized chunks (not too small, or they will lose too much texture). Toss with sugar and ginger, and put them evenly into an baking dish. They should come up about three quarters of the height of the dish. If you are using silicone cup moulds, put them on a tray or inside another baking dish for stability. Fill them 3/4 high, too.

In a medium mixing bowl, combine the dry ingredients of the topping with a fork. Add the coconut oil last, and stir very thoroughly with a fork or pastry blender to ensure that the oat mixture gets thoroughly coated. There should be very little dry and no floury-looking bits, so keep stirring until it all comes together. If you absolutely have to, add another tablespoon of oil (you shouldn't need to). If you press a bit of the topping between your fingers, it should clump together in a crumbly sort of way.

Scrape the topping out of the bowl onto the fruit. Spread it out to evenly cover all of the plums, and press lightly with your fingers to help create a surface-crust when it bakes. Don't press too hard, or you'll compact the topping and it will be a bit tough. Note that you can fill your dish right up to the edge, since it will "settle" a little as it bakes. If your plums are very juicy, they might bubble up a bit over top of the oat mixture in places. This is fine, if not quite as tidy looking.

Bake uncovered at 375 F/190 C for 40 minutes (25 for the little ones), or until the topping has taken on a dark golden hue and has sunk down in the dish slightly. It might be a bit darker on the edges - that's okay. Allow to cool at least a few minutes before serving (but it is plenty delicious at room temperature, or chilled, too). Serve on its own, or with a topping of your choice. Whipped coconut milk, perhaps?


Adorable, aren't they? Just perfect for dessert, breakfast, bento, or a tea-time treat.

August 10, 2016

International Bento: Guam - Chamorro Red Rice


It's a funny thing, but I've been making this for quite a number of years, thinking that it was Mexican red rice. It is not. I mean, it makes sense, because Mexican cuisine makes good use of achiote seeds, and that is what gives the rice that nice red colour. I'm not even sure at what point I made the decision to make this dish, but it was cobbled together out of solid rice pilaf theory and the vague knowledge of Mexican red rice being a real thing. Which, of course, it is. It's just not this.

So recently, I had an idle moment of wondering how far my red rice differed from classic Mexican versions (taking into account that there are probably a few variations), and was startled to discover that what I was making didn't even come that close. Amused at my assumptions, I did a bit more creative googling, and discovered that what we have been happily devouring for several years now, is in fact a Guamanian dish called Chamorro red rice. The name Chamorro denotes the indigenous people of Guam (the name Chamorro also applies to the indigenous people from the Northern Mariana Islands).

Unsurprisingly, there are quite a few different styles of this dish, too, including everything from bacon to peas. While many of the recipes use a very generous amount of oil, mine is more modest, meaning that the rice can go comfortably with a richer dish without feeling too heavy.

The biggest difference that I found between my recipe and most of the others available online, is that I grind the achiote seeds and use the resulting powder in the dish, rather than simply soaking them in water to colour the water, which is then used to flavour and colour the rice.

Chamorro Red Rice

Serves 4

200 grams parboiled rice
1/2 tablespoon peanut oil
1/2 small yellow onion, finely chopped
2 cloves of garlic, minced or crushed
1 heaping teaspoon annatto seeds, ground
1/4 teaspoon coarse sea salt
1/2 teaspoon ground cumin
375 mL water and 1 teaspoon vegetable base (or equivalent vegetable broth)

Heat the oil in a medium pot (one with a tight-fitting lid). Sauté the onion and garlic in the oil, and then add the ground annatto, cumin, and salt. Stir well, then add the rice and stir until the grains are evenly coated with oil.

Add the water and vegetable base (or broth), stir, and bring to a boil. Turn the heat to the lowest possible setting, and allow to cook gently for 15 minutes (covered). Then remove the pot from the heat (don't just turn the burner off) and let it sit for another 5 - 10 minutes before you lift the lid. Fluff with a fork and serve.

So what else is in the bento pictured above? Smokey roasted chicken thigh (bone removed post cooking) and corn seasoned with lime juice, salt, and ancho powder.

I think this dish goes particularly well with Margarita Chicken.

June 08, 2015

Ayam Pedas Asam - Indonesian Sour Spicy Chicken (and International Bento: Indonesian)


Although there is a version of this dish called Ayam Goreng Asam, Sour Fried Chicken, where the chicken is first fried in oil before the sauce is added to the pan, this one has zero added fat. This suggests to me that I can pair it with a richer side dish without the overall meal feeling heavy, but in this case I was in a hurry to use up some cauliflower, so I just roasted that with some curry powder (and a bit of oil) instead.

The butchers and supermarkets here don't offer boneless chicken thigh, for some reason, and it turns out I'm too lazy to bone them out myself, so I've made this with breast. Thigh would be juicier, of course, so if you can get it, go for it.

While this dish is essentially just a meat-and-gravy dish, I think that a bit of Asian eggplant would go beautifully with the other flavours here, so I may try that next time.

Ayam Pedas Asam

Serves 4

500 grams boneless chicken thigh or breast
2 lemongrass stalks
3 cloves garlic
1/3 cup tamarind concentrate (soaked, pulp squeezed & pureed, or prepared)
1/2 cup water
1 teaspoon kosher or coarse sea salt
2 teaspoons ground coriander seed
1/2 teaspoon turmeric
1 teaspoon palm sugar (or date sugar, or raw sugar)
1/2 teaspoon ground white pepper
3 star anise stars
3 Makrut lime leaves (fresh or frozen)
1-2 hot red chiles (such as Thai bird chiles), sliced or minced (or sambal oelek to taste)


Cut the chicken into large chunks, and set aside in a stain proof, non-reactive bowl.

Trim the ends of the lemongrass, and remove the outer tough layers. Slice one into thirds, and cut a vertical slit down to the core along their whole lengths,. Chop the other lemongrass up fairly finely, and put it in your blender or mortar.

If you are using a blender, add the garlic, salt, water, and sugar to the lemongrass, and blend until as smooth as possible. If you are using a mortar, grind the lemongrass with the salt. When mostly smooth, add the garlic, and continue until you have a smooth paste.

In a bowl, mix the lemongrass/garlic paste with the tamarind concentrate, coriander, turmeric, white pepper, chile(s), and anise stars. Scrape the mixture over the chicken, and stir well to thoroughly coat each piece. If you used the mortar method, add the water and sugar at this stage, too.

Let the chicken marinate for 20-30 minutes, or overnight, covered, in the fridge.

Place the chicken and marinade into a large skillet over medium heat, and add the lime leaves. Continue to heat until the liquid is quite bubbly, and then reduce the heat and let cook very gently, turning the chicken pieces occasionally, until cooked through, about 10-15 minutes.

If you still have a lot of liquid in the pan, remove the chicken pieces to a plate, and vigorously boil the sauce until it has thickened and reduced. Add the chicken pieces (and any accumulated liquid) back into the pan, turn the heat off, and gently stir around so that the thicker sauce now nicely coats each piece of chicken.

Serve over scented rice or basmati, with the vegetable side dish of your choice.


March 15, 2015

Roasted Chicken with Mandarins & Ouzo (Plus: International Bento: Jerusalem)


One of our Christmas gifts this year was the gorgeous cookbook Jerusalem by Yotam Ottolenghi and Sami Tamimi. I've been petting the pages for weeks now, but finally got it together to make something from it. This was a wow-factor recipe, turning simple chicken parts into a feast.

As I didn't have a lot of time to source Arak, the ingredient in the original recipe, I went with ouzo (mentioned as an acceptable substitute, and super cheap in these parts) and have zero regrets. I didn't have true clementines, but the Spanish mandarins were a bit tart, and a surprisingly good substitute.

I served this with an easy version of jewelled basmati rice - cooked basmati stirred through with butter, lemon juice, lemon zest, raisins, and a pinch of salt, and it played very nicely with the flavours of the main dish (and, mixed together the next day with some of the leftover fennel and orange slices (chopped up) it made a fantastic salad, too.

The original recipe calls for a whole, disjointed chicken, but I went with three whole chicken legs, and simply divided them into drumstick and thigh pieces.

Wonderfully, this dish can be prepped in advance, so you just need to tumble the marinated chicken into a prepared (ie. lightly oiled) roasting tray (a BIG one), and cram it into the oven.

Roasted Chicken with Clementines & Ouzo

Serves 3-4

100ml ouzo (or arak, per the original)
4 tablespoons olive oil
3 tablespoons freshly squeezed orange juice
3 tablespoons lemon juice
2 tablespoons grainy Dijon mustard
3 tablespoons raw sugar
2 fennel bulbs, trimmed (fronds reserved)
3 whole chicken legs, thighs and drumsticks separated
3 mandarin oranges, sliced (unpeeled) into thin rounds
1 tablespoon thyme leaves
2 1/2 teaspoons fennel seeds, half-crushed
salt and pepper
Fennel fronds, to garnish

Combine the ouzo, olive oil, orange juice (I just squeezed some of the extra mandarins), mustard, and sugar in a bowl, and mix well to combine.

Slice the fennel bulbs (each one into 8 wedges) and the mandarins, and place them in a big bowl with the chicken pieces. Pour the marinade over the chicken, fennel, and orange pieces, and then sprinkle with the crushed fennel and fresh thyme. Turn everything about to get it evenly coated, and then cover and let sit for a few hours (or overnight).

Preheat the oven to 400 F. Spread the chicken pieces (skin side up) and the fennel and oranges in a single layer in a large roasting pan. Pour the extra marinade evenly over the pan, then sprinkle the whole dish lightly with coarse sea salt (or kosher salt).


Bake for 45 minutes.


Remove the chicken and other solid items to a platter, and pour the juices from the tray into a saucepan or small skillet. Cook over high heat until the juices are reduced and become a syrupy textured pan sauce. Serve the chicken with the fennel and orange pieces onto individual plates, and drizzle with the pan sauce. Decorate with reserved fennel fronds, and a good grinding of black pepper. I served this with a slightly fancy rice, but a plain one would be beautiful, too. Couscous would probably also work very nicely.

Reheats wonderfully the next day (it's a good idea to remove any meat from the bones before putting leftovers away), as in this international bento below:


August 10, 2014

International Bento (Mixed): Ham, Cheese, & Walnut Crêpes with Greek Salad


I've been making crêpes fairly often since we moved to Germany. They're a wonderful, multi-purpose flatbread that you can make in advance, even refrigerating for a few days (or freezing...separate each one with parchment, and bag them up) so that you can have them on hand for quick breakfast, lunch, snacks, hors d'oeuvres, dinner, or dessert. It's all about what you fill them with, and how many of them you want to eat at a time, that determines their role.

I have posted a recipe for Crêpes before, showcasing one of the wonderfully tender and silky French styles of crêpe. I still make those (they are especially good as dessert crêpes, with a sweet filling), but I also have another, slightly less eggy-and-rich go-to recipe for an everyday crêpe that can be used in exactly the same way.

These crêpes are the ones you want to use if you want the emphasis to be on the filling slightly more than the crêpe itself (don't worry, they're still delicious!), if you want a slightly lower fat/calorie version, or if you go to make crêpes and discover that you only have two eggs on hand. If you are planning breakfast crêpes with an egg filling, you probably want to use this recipe rather than the other.

The ratios are from Cook This Not That! but with better (I think) mixing directions.

You can easily halve the batch, or double it, as you see fit.

Everyday Crêpes

Makes 10-12 6-inch crêpes

1 cup unbleached all-purpose flour
pinch of salt
2 large eggs
3/4 cup milk
1/2 cup water
1-2 tablespoons melted butter

In a medium mixing bowl (or food processor, or blender), mix the flour and salt. Separately, combine the eggs, milk, and water, and beat well. Add the liquid mixture to the flour, and whisk (or process with a cutting blade) until smooth.

If you are mixing by hand and cannot get rid of a few lumps, simply pour the batter through a sieve, and push-through or discard any lumps left behind.

Stir in the melted butter, and then let the batter rest for about 15 minutes so that the flour fully hydrates. If you're planning to fill the crêpes right away, you might want to get your filling(s) ready while the batter rests. Otherwise, just pour yourself a glass of something pleasant - might I suggest wine? - to sip at during the cooking process.

To make a six-inch (15 cm) crêpe, I use an eight-inch (20 cm) non-stick skillet. The skillet is usually measured by the width of the top of the pan, but the base is usually somewhat smaller. The base of my skillet is just over 6 inches. You can use whatever size skillet you like, for whatever size crêpes you like, but I find this to be the best all-purpose crêpe size.

Just like in the previous recipe:

Heat the skillet over medium heat until a drop of water dances. Spritz with canola oil, or brush very lightly with mild oil of your choice. You only need to do this for the first crêpe, if you're using a non-stick pan.

Using a ladle or scoop that holds 3 tablespoons, measure your first crêpe's worth of batter. Lift the skillet off of the heat (I hold it in the air) and quickly pour the batter into the middle of the pan. Drop the ladle back into the batter-bowl and rapidly tilt the skillet in a circular motion, to spread the batter until it evenly covers the base of the pan. Return the pan to the burner, and allow the crepe to cook until lightly golden, and the edges release from the pan, about a minute or two.

Slide a silicone spatula under the crêpe (or grab the edge carefully with your fingers) and flip it over. Let it continue to cook for a minute, and then slide the crêpe onto your work surface for filling.

Repeat until all of the crêpe batter has been cooked. This does take a little bit of time, unless you've got multiple skillets going and are multi-tasking like a champ, which is (well, one reason) why I suggest having a beverage on hand to sip while you cook.

The crêpes in the bento above have a filling of Tilsit cheese (you could substitute Havarti), very thinly sliced ham, and chopped toasted walnuts. I find that it's important when considering crêpe fillings to ensure that there is something that will act as a sort of "glue" to keep the filling together while you're eating. A filling of only dry items, such as dice chicken, chopped almonds, and asparagus will simply fall apart into its discrete components once you cut into it. A small amount of cheese, or scrambled egg, or thick sauce (or paste) of any kind will help keep the filling together.

The other compartment of the bento above has a Greek-ish salad chopped cucumber, bell pepper, tomato, feta, radishes and an oregano lemon dressing, and the little dark item is a miniature Chocolate Oatmeal Peanut Butter Chip muffin, as a tiny little dessert.

May 31, 2014

Himmel und Erde (Heaven & Earth), plus International Bento (German)


Himmel und Erde (Heaven and Earth) is a classic regional meal popular in the state of Rheinland-Pfalz (also called the Rhineland-Palatinate), among others.

This is really more of a serving suggestion than a recipe - I'm assuming that you know how to make simple mashed potatoes, and can source decent sausage, onions, and applesauce. A basic sort of peasant dish, Himmel und Erde is simply mashed potatoes, served with sausages, applesauce, and fried onions. Himmel, or Heaven, is invoked by the apple, which grows high in the air, and Erde, or Earth, is invoked by the potato, which in some German dialects is Erdapfel ("earth apple", not unlike the nomenclature for French pommes de terre, which also means "apples of the earth"). But where do the sausage and fried onions come in? Well, short answer is, that the sausages are pork, and Germans seem to serve pork with almost everything. Fried onions are just a bonus.

The classic iteration of this dish that I can find is with blood sausage and bratwurst, and that's what I've done here. The blood sausage is a smokier version of the United Kingdom's blood pudding, which you could also use in a pinch. The applesauce I made by peeling and dicing some pie-making apples into a saucepan with a pinch of salt and some water, and then simmering and stirring until they became sauce, but you could use any applesauce you like (I would avoid overly sweetened ones myself...but a lot of Germans probably wouldn't). Then, it's just a matter of cooking it all up and getting it onto the plate.

So, boil your potatoes to make the mash, and warm up your applesauce. While that's happening, sauté your onion rings in the same skillet that you're using to cook up the bratwurst. When the applesauce is ready, turn it off with a lid on to keep it warm. Push the onions and bratwurst to one side of your skillet, and add the slices of blood sausage to the pan. Let the blood sausage cook over medium heat (turning once) for about five or six minutes, while you mash the potatoes. Once the potatoes are mashed, the onions and sausages are fried and standing by, assemble as desired.

I'm contemplating a slightly more elegant version of this dish using roasted potatoes and apples in wedges, in some sort of clever baking-dish assembly, but that hasn't happened yet.

I sent the leftovers to work with Palle the next day as a German bento. There are extra onions acting as a bed for the blood sausage, and no bratwurst (this seemed plenty filling for a lunch as it was). His co-workers seem to find it amusing when he arrives with home cooked German food for lunch, while many of them head out for pizza and Burger King.

February 16, 2014

Hasenpfeffer (plus International Bento: Germany)


As any Bugs Bunny fan knows, Hasenpfeffer is a delicious German rabbit stew (probably best made without cartoon rabbits). This dish can be made with a whole, cut up rabbit, or with just hind legs, which makes for big, meaty pieces for each serving. In Germany, rabbit is a popular enough meat that it is available in the grocery stores either whole or in a variety of cuts (and even as pre-made frozen dinners, actually), so it is simple and affordable to purchase only the hind legs, which is what I've used here.

It is essential that the rabbit be marinated, although different regions vary significantly in what exactly constitutes the correct marinade - everything from red wine, to white wine, to vinegar, or even some of each. The stew is well seasoned with onions, bay leaves and peppercorns, and simmered slowly for a rich, luxurious flavour. Some recipes also called for dried fruit (most notably plums) to add a subtle sweetness to the gravy. My recipe is a hybrid of many different recipes that I encountered in my research.

Hasenpfeffer

Serves 4 - 6

1 kilogram rabbit pieces (hind legs are best)
2 cups dry red wine (I used a Spätburgunder, which is essentially a German Pinot Noir)
1 1/2 inch cinnamon stick
12 Juniper berries
10 black peppercorns
3 large bay leaves
2 large onions, diced
2 cloves garlic, crushed
1 1/2 cups diced celeriac (stalk celery is also fine)
kosher salt to taste
2 tablespoons peanut oil (or olive oil)
1/4 cup unbleached wheat flour

If you want to make it an all-in-one meal, you can also add some diced carrots and potatoes, but be sure to add them towards the end of the braising time, or they will turn to mush.

In a non-reactive bowl (glass (eg. Pyrex) works well), marinate the rabbit pieces overnight in the red wine, along with the cinnamon, Juniper berries, bay leaves, and black pepper. Turn the pieces once or twice as necessary, to ensure it marinates evenly.

Remove the rabbit from the marinade (reserving the marinade), and dry the pieces well. Toss them in the flour, shaking well afterward to ensure that there isn't too much flour on each piece (I give each piece a little spank to shake off the excess). Fry the rabbit pieces (in the peanut oil) in a large skillet over medium-high heat, until well browned on both sides. Work in batches if necessary. As the pieces are finished frying, remove them to a dutch oven. When all of the rabbit pieces are fried and standing by, add the onions, garlic, and celeriac to the skillet, and sauté briefly. When the onions have started to turn translucent, add the sautéed vegetables to the rabbit.

Into the emptied skillet, pour the wine and spices (the reserved marinade). Bring up to a simmer, and let reduce by about a third. Make a slurry of about a tablespoon of the leftover flour from the rabbit-frying stage, and a little water (about 1/2 cup). Add the slurry to the reduced wine, and stir well until it begins to thicken. Remove the spices (a sieve works best). Pour the wine mixture over the rabbit and vegetables, and put the dutch oven over medium heat. Try to arrange the rabbit pieces and vegetables as compactly as possible, so that it takes as little liquid as possible to cover the meat. If the meat is not completely covered, add some broth or stock (chicken, vegetable, or game is all fine) or water until the meat is just covered.

Bring the dish to a gentle simmer and reduce the heat to low. Cover, and allow the dish to braise slowly for about one and a half hours (you can do this in the oven, if you like).

Remove the rabbit pieces from the sauce onto a platter and keep warm. You can serve them on the bone, or with the bones removed - I chose on the bone, simply for the presentation, but after dinner I removed the bones from the leftovers that would be used for the bento (see below).

Press the sauce-liquid and vegetables through a sieve to make a smooth sauce (you could also use a stick blender). Taste, and correct for salt if necessary. The sieved vegetables will add body, but if the sauce is a bit thin, you could choose to thicken it at this point.

If you are serving the pieces on the bone, simply plate and ladle some sauce over top. If you are serving boneless, remove the bones from the meat, and return the meat to the sauce before serving.

We served this on homemade spätzle with braised red cabbage and apples, which is a fairly classic combination, all of which also went into the next day's bento lunch.


March 10, 2013

Kale Gomaae


I've always loved the enticing little dishes of blanched spinach dressed with sesame that one finds in Japanese cuisine. My earliest attempts at making them at home were somewhat laughable - I firmly believed that I shouldn't need to cut the spinach, despite all evidence to the contrary - but what I really disliked was the step of squeezing the water out of the cooked vegetable. I didn't like the squeezing, and I didn't like the look of the spinach after I was done. I was doing it utterly wrong.

Happily, this recipe does not require squeezing of any kind. I make no claims for culinary authenticity, of course, and I must confess that this is ultimately an outgrowth of an Italian recipe for balsamic-glazed kale with pine nuts, of which I am also very fond. I can say without hesitation that this dish is both a delightful addition to any lunchbox that wants a little extra vegetable, and a perfect companion to a rice or noodle based dinner. There are many different dressing recipes for a Japanese gomaae, so if this one doesn't strike your fancy, I suggest that you keep the method and substitute the dressing of your preference.

One of the delightful things about kale is that it is quite sturdy. While it does require a bit of preparation to clean, remove central stalk, and slice the kale (see below), you can do this ahead and keep it crisp and ready for a few days, in a sealed container in the fridge. Then, dishes such as this become a snap to pull off at the last second when you decide that you really should have some sort of vegetable with your chicken teriyaki or tonkatsu, or even miso halibut cheeks.

Kale Gomaae

Serves 2 - 4

250 grams lacinato kale, cleaned and prepared (see below)
1 tablespoon lower sodium soy sauce
1 tablespoon mirin
1 teaspoon sesame oil
1/2 teaspoon honey (or agave)
1 teaspoon sesame seeds, lightly crushed
1/2 teaspoon sesame seeds, for garnish

Combine the soy sauce, mirin, sesame oil, and honey/agave with the crushed sesame seeds. Set aside.

Run cold water over your prepared kale, drain immediately. The water still clinging to the leaves is desirable, to provide steam. In a medium skillet or wok (I use a 9" steel skillet - nonstick is not necessary), over high heat, place the prepared and drained kale and begin to move the kale around as it wilts (I use a silicone spatula). If necessary, sprinkle a little more water over the kale, and continue to stir it around until the leaves start to become tender, but are still bright-looking (well, as bright as "black kale" gets, anyway).

Add the combined sauce mixture, and continue to stir until the dressing has been evenly stirred through and each leaf is lightly dressed. Remove to serving bowls, and garnish with extra sesame seeds.

The kale can be served warm or cold.

I plan to serve it the next time I make the Miso Halibut cheeks mentioned above, in fact (which is likely going to be soon, because that sounds really good). Incidentally, you can see one of my messy spinach gomaae attempts over in that link, too.

How To Prepare Lacinato Kale - in pictures

For long leaves, I cut them in half to make them easier to manage

Cut along the spine of the leaf, as close as you possibly can

Turn the leaf around, slice the spine off and discard

Repeat with the other half of the leaf


Stack the leaves and slice into ribbons

If you want to store them for a few days, use a container with a good seal, and place a dampened paper towel on the top before closing. Store in the crisper of your fridge

Ready to go!

August 19, 2012

International Bento (China): Chicken wings bento


My last post reminded me that I've really fallen down on posting my bentos, so here's another one: Chinese-inspired chicken wings ("Beijing Wings" from Cook This, Not That!), pork fried rice, and baby bok choy with spicy vinaigrette.

The pork fried rice is much like pork fried rice anywhere - a bit of egg, a bit of bbq pork from a Chinese butcher, some onion, leftover plain long grain rice. There's an art to a great fried rice, but this one was just a quick, cobble-together: tasty, but not truly a classic of its kind.

The bok choy in vinaigrette did not enjoy waiting in the fridge until morning, and it looks as though I may have over-steamed it, too, as it's usually a bit brighter green. The vinaigrette is a mixture of soy sauce, rice vinegar, sesame oil, sambal oeklek, minced ginger, and minced garlic. I don't use measurements when I make this up, but I don't use much oil. It's more like a dipping sauce than a real vinaigrette, but it goes beautifully on steamed or stir-fried bok choy, gai lan, or other strong greens.

The wings are fairly simple to make, and are baked instead of fried, so, theoretically a bit healthier for you, even though the skin's still on.

Beijing Wings
Adapted from Cook This, Not That!

Serves 3 - 4

1 kilo chicken wings, jointed (freeze the tips for making stock)
1/3 cup low sodium soy sauce
3 tablespoons brown sugar (or honey)
4 cloves of garlic, minced
2 tablespoons freshly grated ginger
2 tablespoons butter
2 tablespoons Sriracha
1 - 2 tablespoons fresh lime juice (half a lime)
toasted sesame seeds
1 green onion, sliced

Combine the soy sauce, sugar, garlic, and ginger in a large glass or ceramic bowl. Add the wing sections (you can also buy just paddles or drumettes) and stir them around until they are well coated. Cover the container with its lid or plastic wrap, and refrigerate for at least an hour, four or eight hours being better (ideally, do this after breakfast to be ready for dinner).

Preheat the oven to 450F, and line a baking sheet with foil. Spray the baking sheet with a thin layer of canola spray (or brush lightly with peanut oil). Drain the wings from the marinade (discard the marinade). Lay out the wings in a single layer on the foil, and bake for about 15 minutes. The skin should start to get crispy. Turn the wings over and bake for another 5 to 10 minutes.

In a large skillet, melt the butter and Sriracha, stirring to combine. Remove the wings from the oven, and quickly add them to the skillet. Toss the chicken around in the hot sauce, and saute for a couple of minutes. Remove the chicken to a platter, and garnish with sesame seeds and thinly sliced green onion.

August 04, 2012

Ethiopian Beet & Potato Salad (and Bento)


Ethiopian cuisine has wonderful salads. The cool lemony character of this one is quite refreshing, and the two-tone pink and purple appearance is pleasingly cheerful. This recipe is adapted from Meskerem Restaurant (Washington, DC), by way of Epicurious, as well as local versions of the dish as served here in Vancouver. It is vegan, gluten-free, and great for picnics, bento, or any other packed meal.

Ethiopian Beet & Potato Salad

Serves 8 - 10
Total Prep & Cooking Time: 1 hour

450 grams yellow potatoes
450 grams red beet roots
1/4 cup fresh lemon juice
2 tablespoons peanut oil*
1/2 onion (yellow or red), finely diced
1 jalapeño chile, seeded and finely diced
1/4 - 1/2 teaspoon kosher salt, to taste
1/4 teaspoon yellow mustard seeds
Pinch ground fenugreek seeds

Wash and trim the beets, and simmer in a medium saucepan for about 35 - 45 minutes (depending on size), or until tender. Remove the beets from the liquid, and slice in half. Use a paper towel (or three...or a dexterous use of spoons to be waste-free) to remove the skins from the beets – they should just rub right off. Dice into bite-sized pieces. You may want to protect your cutting board from the pink dye in the beets – a couple of layers of waxed paper, or waxed paper over newspaper should work. Protect your hands, too, or you will have pink fingers/nails, although it comes off in a day or so. (Note: you can also roast the beets in foil or parchment instead of simmering them, especially if you happen to have oven on for some other purpose.) Wash all cutting boards etc. right away to minimize stains.

Meanwhile, in a separate saucepan, gently simmer the peeled and bite-sized diced yellow or white or red-skinned potatoes for 20 – 25 minutes, or until tender. Drain the potatoes, and let them dry out a little in the warm pot.

While the beets and potatoes are cooking, dice the onion and jalapeño, and place them in a large serving bowl with the lemon juice and peanut oil. When the potatoes have dried off a little, add them (still warm) to the onion mixture, and gently combine. Add the beets, and stir through until everything is a lovely pink shade. Toast the yellow mustard seeds just until they start popping, then pour them over the salad, along with the salt and fenugreek powder. Stir well to combine. You can make this ahead by a day or three. Keep tightly covered in the refrigerator.

* For peanut allergies, substitute the mild-flavoured vegetable oil of your choice. Canola works well.

My International Bento: Ethiopian edition, contains Berbere-baked chicken drumsticks, Ingudie & Yellow Peas Wat, and Beet & Potato salad. Hearty, and delicious!


December 31, 2011

Nasu Dengaku - Miso-Glazed Eggplant


I first had this at a little Japanese restaurant in my neighbourhood, one which is both one of the best in town in addition to being one of the closest restaurants to my house. Vancouver is awash in a sea of sushi joints, often of middling quality, so one that offers dishes that go beyond the California roll are a joy to see.

The restaurant version of this tends to be deep fried, but lightly done, but the home version, simply popped under the broiler, is just as delicious, with a sweet and salty glaze that either revs up your taste buds as an appetizer, or beautifully complements a main course. It's also great in a bento (see below), either at room temperature or re-heated. I went a little light on the sauce, as you can see, and would probably use a little bit more next time. You can also use dark purple, smallish, round eggplants for this, which do tend to keep their colour a bit better, if elegance of presentation is important to you. Really large eggplants are likely too tough for this type of dish, however.

Nasu Dengaku
Serves 4

2 medium-small asian eggplants (thin skinned if possible)
3 tablespoons miso (I like red miso, but any will do)
1/2 tablespoon sugar
1 tablespoon mirin
1 tablespoon sake
1 teaspoon sesame oil
1/2 teaspoon soy sauce

Wash and trim your eggplants, and halve lengthwise. Cut a large diamond pattern into the fleshy cut side with a sharp knife, not going down through the skin. Brush the cut side with sesame oil, and roast or broil, cut-side-down, for 10 to 20 minutes. You can also dry-roast the eggplant in a skillet on the stovetop, if you prefer.

Mix up the dengaku sauce of miso, sugar, mirin and sake, until thoroughly blended, and heat in a small saucepan. Beat vigorously with a wooden spoon, until the sauce turns glossy, thinning with a couple of drops of water, if needed. Divide the sauce between the four pieces of eggplant, brushing it into the diamond cuts. Broil the eggplant very briefly to caramelize the edges of the sauce, slice into chopstick-friendly pieces, and serve. As you can see, I favour green onion as a garnish, because it looks very pretty, and the mild pungency of the onion is a nice contrast to the salty-sweet of the sauce.

The sauce also works as a lovely glaze for pan-seared tofu, or sauteed or broiled mushrooms.


Like the dinner plate above, this bento contains a layer of thinly sliced sesame beef with beech mushrooms on Japanese rice in the one tier, and nasu dengaku, black sesame carrot kinpira, and a mini cucumber in the other.

Happy New Year, everyone! May your year be filled with deliciousness.

August 15, 2011

Meatballs: Pork & Turkey edition

I wasn't originally planning to post these, I just wanted some meatballs. However, after they turned out rather well (Palle suggested that they are the best meatballs I've ever made), and since I did kind of scribble down the proportions as I was going along, and since it turns out they are equally delicious cold (hello, bento!), I decided to share them.

I don't make meatballs or meatloaf very often, but I do like them rather a lot, as a main course unto themselves, as part of a pasta dish, as a little protein add-on to a salady sort of meal, or as a sandwich filling. Not to mention the "on a little toothpick" hors d'oeurves application.

The meatball matrix is pretty simple: ground meat(s) of your choice, seasoning, binder, corrector, and featured ingredient (if any). These meatballs are half lean ground pork and half ground turkey breast (hence the pale colour, in case you were wondering), seasoned with salt and pepper, fresh garlic, whole fennel seed, fresh parsley, and ground oregano, bound with egg, corrected with panko, and featuring finely chopped roasted red peppers and green onions.

As with hamburger and meatloaf making, one of the keys to great texture is to avoid over-mixing or over-compressing of the meat, and that means that the best tool for the job is your impeccably clean fingers. Don't be afraid to get right in there - you will have much better distribution of ingredients that way. I am also a fan of putting everything but the meat into a mixing bowl, giving it a bit of a stir with a fork (to break up the egg), and then separating the ground meat into little clumps with my fingers and dropping the bits on top of the rest of the mixture. Once all of the meat is aerated and added to the bowl, I get my fingers in there and toss it like a salad, to avoid the aforementioned over-compression. Once everything is nicely combined, I begin shaping the meatballs. This method works wonderfully for any time you are mixing ground meats.

Pork & Turkey Meatballs
Makes 12 large meatballs

450 grams lean ground turkey
375 grams ground pork
1 large egg
1 whole roasted red pepper (such as Piquillos)
1/2 teaspoon kosher salt
1 teaspoon dried oregano
3 cloves garlic
1 teaspoon fennel seed
1 teaspoon dried basil
1/2 cup minced parsley
1/2 cup panko-style bread crumbs
1/2 teaspoon ground white pepper
1 teaspoon Worcestershire sauce

Combine all of the ingredients as described in the paragraph above, separating the meat into chunks, and then mixing in the rest of the components. Fry up a tiny nub of meat until cooked through, and taste to see if you need to adjust the ingredients - more salt or fennel seed, for example. Correct the seasoning as needed.

Place, spaced out, in a 9x13" glass baking dish. Sprinkle each ball with a little Worcestershire sauce. Bake at 400 F for 40 minutes - they should be just golden brown. Use a spoon to trim any "spill" of liquid into the pan, as you lift them out, once they are cooked through. If you want a slightly browner meatball, you may wish to brush them with a little soy sauce half way through, but note that this does add a bit of extra saltiness, too. Low sodium soy sauce might be your best choice, there.

You can fry these up on the stovetop, too, of course, although the meat mixture is quite moist, and you are likely to get misshapen meatballs for your extra effort. I highly recommend the baking/roasting method - the balls keep their shape, and you can spend the time that you would have been tending to the meatballs to do something else.

As mentioned above, these are great hot (for example, beside a nice polenta, or a potato-and-vegetable salad, or cold, in your bento (beside...a potato-and-vegetable salad, perhaps...)
If you're planning to make a meatball sandwich, you'll want to have a little sauce, I'm guessing. If you have a stash of leftover sauce in the freezer, this is a great use for it. Otherwise, you can either make a simple sauce from scratch, or purchase one. Warm the sauce together with the meatballs, if you are starting with cold, pre-cooked meatballs. You may want to toast up the bun, too, to add to structural integrity of the sandwich, given how damp even a thick tomato sauce can be. If you want to make your bread garlic bread, I'm certainly all in favour of that. I tend to use Portuguese buns, because I can get good ones in my neighbourhood.
These ones don't really look cooked, but they are - they're from the same batch as the bento shown above.. This is a flaw in the lighting/photography rather than the meatballs themselves, though. Of course, pork and turkey are very light-coloured meats, and I didn't do the extra browning step.

August 06, 2011

Azifa - Ethiopian Lentil Salad

Last year, I was surprised and irritated to discover one of my photos (from the era before I labeled them) was being reproduced all around the internet. Half of my irritation was at the (uncredited) misappropriation of my photo, and half was that it was being wrongly used - it wasn't Azifa at all. The photo had been taken from my old website (linked here)(Update: link has now expired, but you can find the original recipes in the comments below); there are two recipes on the original page - one for the delicious Ethiopian lentil salad called Azifa, and the other was an also fabulous Turkish lentil salad (which I believe translates as yeşil mercimek salatasi). There was only one photo, though: the Turkish salad. The photo had been mercilessly hijacked and propagated with the wrong recipe attached (or versions thereof). I figured the tomatoes in the original photo would be a dead giveaway as to which salad was pictured, but no - it turned up on a number of recipe collection sites and even once on the menu of an Ethiopian restaurant. To the best of my knowledge, those copies have now been taken down.

So now, years after posting the original article on two versions of a green lentil salad, and while I'm in a sort of mood of re-addressing old favourites, I thought I would finally give Azifa a photograph of its own. It may not be the prettiest or most colourful salad, but it is delicious! Do check out the comments of this post for the recipe - it's a fine summer dish, especially with a glass of crisp white wine, or a hoppy IPA. It also packs well for lunches (and bento!) and makes a great pita stuffer, but it also pairs beautifully with grilled salmon, or lemony yassa.

Here's a different picture, from a different batch, with different lighting:

June 26, 2011

International Bento (India): Cauliflower & Green Bean Korma

It's bento time again! This is a big bento box for a big appetite. It's sleek, matte black, and has a built in storage compartment for your chopsticks as part of the lid in the airtight top section. We call it the Ninja Bento Box, for obvious reasons. This bento was packed after the curry had cooled, so the sauce looks thicker than it really is when it is freshly made or re-heated.

I was surprised to realize that I hadn't actually done an Indian bento yet. While this is one of the simplest types of bentos imaginable - an inelegant arrangement of leftovers, really: some rice on one side (basmati, of course - not only appropriate to the cuisine, but also our default rice), and vegetable korma on the other.

The korma recipe is one that I have posted previously here, back in 2006. I haven't changed it much, except that I now often remove the cardamom seeds from the pods before throwing them into the pan, so that I don't need to fish them out later, and I puree the sauce before adding the featured ingredient. This korma was simply trimmed and sliced green beans, and cauliflower florets, thrown in at the point where one would usually add chicken or tender lamb. You can use any vegetable you like, of course, such as this version here from 2007, which included chickpeas, broccoli, bell pepper, carrots, and homemade paneer. The sauce is just that versatile - it can be meaty, vegetably, or some combination depending on your whim (or the state of your fridge).

Cauliflower takes to curry like the proverbial duck to water. It doesn't seem to matter what kind of curry, perhaps because cauliflower is such a mellow flavour to begin with, but it soaks up any sauce you put it in like it was especially designed to do so, and it doesn't suffer from significant texture loss when you re-heat it, which is a real bonus for packing up the leftovers as lunch.

I was a little startled to discover that I've been making this recipe regularly for five years now. It's my go-to when I want a homemade curry but don't have the energy or adventurousness to try something new or tricky, or if I'm just in the mood for something dependably comforting.

April 25, 2011

International Bento (Japan): Gyoza-Meatball Bento!


What happens when you are making gyoza, and run out of wrappers before you run out of filling? Well, you could run out and buy more wrappers, certainly, or make up another batch by hand if that's the way you roll. However, if you only have a small amount of filling left over, why not just make meatballs?

To make sure they fit nicely into my rather flat bento, I shaped them more like tiny burger patties, and simply fried them up. So, I guess you could either call this "skinless gyoza" or flat meatballs. I "dressed" them with a little dollop of leftover tonkatsu sauce from a previous dinner, which was absolutely the right condiment (although spicy bean paste or miso gravy would have also been good). The filling I was making was pretty much the same as the pork filling, but I sometimes play fast and loose with the quantities of mushrooms and/or cabbage, which is why I ended up with a little extra this time. You can also substitute the ground pork for ground turkey, with tasty results, and one day I do intend to get around to trying a scallop-prawn gyoza.

Since gyoza filling is not cooked in advance of dumpling assembly, it's easy enough to shape any leftover bits into meatballs - you could freeze them uncooked, naturally, but I just cooked them up on the spot, downed one as a snack (just to make sure they were tasty, you understand) and packed up the rest for a lunch.

The rest of the bento is probably fairly self-explanatory: Radish lotus flowers (they look more like lotus flowers or lilies to me than roses, when cut this way), raw snow peas, and Japanese steamed rice with togaraschi shichimi sprinkled on top.

This was a fairly filling bento, between all the rice and four large meatballs, so it wasn't as balanced as it could have been. A little more veggie matter, or some fruit for dessert would have sorted that out nicely but, to be fair, I made this bento out of refrigerator scraps, essentially, so I was pretty pleased with it.

I'd like to get back into making more bentos. We've been eating out in restaurants a lot since the move, what with work schedules, hockey playoffs, and loads of new restaurants suddenly more available to us, so our leftovers haven't always been bento-friendly (or I've been too lazy to make them so). I do enjoy the way bento-making encourages the planning of a balanced lunch more than simply putting leftovers of a main dish into a container without thought or side dishes. It feels like a step in the right direction, and gets more fruit and vegetables into my lunchtime.

April 16, 2011

Takikomi Gohan

Another rice post - but rather different from risotto!

I've always enjoyed the small bowls of mixed rice, or takikomi gohan that one can get in Japanese restaurants - they provide a wonderful, warm, savory hit of satisfaction. The kind I tend to see around Vancouver are usually made with chicken, with mushroom, or with both, and I went for the combination, since it struck me as a fine idea for a casual supper at home.

I went looking online for suggestions regarding recipes, and there certainly is a number to choose from, each with a different approach to the necessary components. After a lot of searching, I finally came back to the incredibly useful Just Hungry food blog, the sister site of Just Bento. Her recipes are for straight-up mushroom (one traditional, one vegan), but she does mention the addition of diced chicken instead of bean curd, so that's the option I took. I thought I was getting the chicken pieces small enough, but next time I will dice them more finely.

The recipe itself is simplicity, if you are using a rice cooker. Chop your mushrooms (and chicken) and allow to marinate for an hour or so in a small amount of a mixture of roughly equal proportions of soy sauce, mirin, and sake. Add this mixture on top of the rice and water mixture in your rice cooker, then turn it on as usual for plain rice. Gently mix with a paddle when it is cooked, to integrate everything. Garnish as you please.

It is not a particularly elegant dish, as you can see below. It is simple, comforting, and easy fare, and one I intend to repeat again soon. The leftovers, as you can see above, made absolutely charming onigiri for a bento lunch the next day (and froze fairly nicely, too).

You can use whatever mushrooms you like. We used a combination of shiitake, king oyster, and enoki. Next time, I plan to include shimeji (beech mushroom), since I found that HMart carries the more widely cultivated bunashimeji. But really, any mushroom that you enjoy eating will work just fine.

I'm surprised it took me so long to try making this for myself, because it is very rewarding for the small amount of prep involved. Even if you've never had the restaurant version, you might want to give this a try: it is a solid entry in the grand category of soothing rice-with-bits dishes.

December 29, 2010

International Bento (Afghanistan): Burani Bonjon


I realize that I have not yet posted any of the holiday baking or cooking that we have done this past month, and I'm not going to get to it again, either. I confess to be a little weary of butter tarts, shortbread, and cranberry oat squares at this point, and I'm right back to craving the savory foods that we tend to rely upon.

This bento was constructed from leftovers from a dinner that Palle cooked earlier this month, and we're definitely going to have it again. The lamb curry in almond milk (a sort of Afghani korma, if you will) was tasty but a tad monotone, and may want a little tweaking, before I'm ready to post it up. The eggplant dish, however, Burani Bonjon, was outstanding. Outstanding! Here it is again below, as we had it the first night, since I fairly drowned it in yoghurt sauce in the bento picture.


One of the marvelous things about this dish is that it is served at room temperature, or chilled, meaning that it a) can be made in advance, and b) is perfect for bento (although, I did remove the lamb curry from the bento to warm it up anyway). The other marvelous thing is that, while consisting wholly of familiar flavours, the combination was so delicious that I really could not get it into my mouth fast enough.

Burani Bonjon
Serves 4

1 large eggplant (about 8" long)
200 ml. canned diced tomatoes, drained
4 garlic cloves, crushed
4 tablespoons olive oil
1 teaspoon turmeric
1 teaspoon powdered cayenne
salt & pepper to taste
Aleppo pepper (for garnish)
Seer Moss (for garnish, see recipe below)

Slice the eggplant into coins. Lightly, but liberally salt both sides and allow to rest on a cooling rack over a cookie sheet for about an hour, to draw out the bitterness. Rinse the salt off, and pat the slices very dry.

Saute the crushed garlic in half the olive oil in a large, heavy-bottomed skillet until fragrant, the remove the garlic to the side. Add the (dried) eggplant slices to the skillet and brown both sides, cooking in batches if necessary, and adding the remaining oil as needed (eggplant soaks up oil pretty fast).

Reduce the heat and add the tomato, garlic, turmeric, cayenne, salt and pepper. Simmer until the eggplant is very tender. Serve warm, or at room temperature (not hot!). Drizzle with Seer Moss and sprinkle with chopped cilantro and Aleppo pepper.

Seer Moss: Garlic Yoghurt Sauce

This makes a lot of sauce, but you will love it as a vegetable dip, or as an alternative to Tzatziki, so make the whole batch.

1 cup plain yoghurt
3 - 4 cloves crushed garlic
2 tablespoons lemon juice
2 tablespoons minced fresh mint
2 tablespoons olive oil
pinch salt

Combine and let chill for at least an hour to allow the flavours to meld, but remove from fridge 15 minutes before serving, to take the chill off.

I can't wait to have this again.

December 04, 2010

International Bento (Germany/Ukraine): Sausage & Sauerkraut


Internationally speaking, this bento is a little German, a little Ukrainian/Russian, a little Polish... and generally north eastern European.

This bento was the result of leftovers, as is my usual modus operandi, The sausages and sauerkraut were cooked together in Riesling wine, using the recipe from Nigella Express, the perogies are potato, from Alenka on Kingsway in Vancouver, with caramelized red onions sprinkled over them.

I do note that the amount of sauerkraut that the recipe makes far exceeded our needs, so be advised to cut it in half if you don't want leftover kraut. Also, the amount of wine does not sufficiently cook away in the cooking time, so I have reduced it from 750 ml to 500 ml. The good news is, you get to drink the remaining 250 ml with dinner!

Sausages with Sauerkraut
Adapted from Nigella Express
Serves 6 - 8

950 grams jarred sauerkraut, rinsed and drained
2 teaspoons juniper berries or sprigs of fresh rosemary
3 dried bay leaves
8 smoked sausages, cut into shorter lengths
2 cups/500 ml dry Riesling wine
1 teaspoon white peppercorns

Spread the drained sauerkraut in the bottom of a small roasting pan. Sprinkle with juniper berries, bay leaves, and white peppercorns. Add the sausage pieces in a single layer, and carefully pour in the wine. Bring the mixture to a boil on the stovetop, then cover with foil and place in a 400℉ oven, and bake for 30 minutes (check the liquid level after 20 minutes, as your mileage may vary). Serve with mustard.

If you do not have juniper berries, sprigs of fresh rosemary give a similar effect of a woodsy floral note. It's not the same, of course, but it is a lovely alternative if juniper berries aren't something you can easily get.

November 18, 2010

Apple Crisp, plus Apple Crisp Bento


Apple crisp has always been one of my favourite desserts.

It's not the prettiest thing going, so it doesn't suggest you need to wait for some sort of special occasion, and it's not a lot of work, unless you're afraid of peeling a few apples. It doesn't have tricky pastry, or challenging timing issues. It can be eaten hot or cold, plain or garnished with ice cream, for dessert or even for breakfast, really, since it contains both fruit and rolled oats and can therefore be classed as health food. You can make them any size you like, but more on that later.

Somewhere in my house (I think), lies a recipe card with my mother's Apple Crisp recipe (serves eight). It didn't get put back in its box one day, and has been missing in action ever since. There's a reasonable probability that it got swept up with some recycling, and will never be seen again. This makes me quite sad.

Fortunately, it's not a terribly complicated recipe, and I've been scaling it back to four servings for years, and tweaking the spicing and toying with adding almonds or dried cranberries or whatnot, so I didn't really need my mother's recipe, although I'll be very happy if it turns up again next time I sort through the cooking bookcase.

Anyway, I've attempted to recreate the basic recipe here. It turned out exactly as I wanted, so I'm feeling pretty pleased about the whole thing.


Apple Crisp

Fruit Layer
4 to 5 medium apples (I like to use Galas)
2 tablespoons brown sugar
1/2 teaspoon cinnamon

Crisp Layer
1/2 cup all-purpose flour
1/2 cup rolled oats
1/2 cup brown sugar (lightly packed)
1/4 teaspoon kosher salt
1/2 teaspoon cinnamon
1/2 teaspoon ground nutmeg
1/4 cup butter, melted (or: 3 tablespoons butter, melted, plus 1 tablespoon cut into tiny pieces)

Peel and core the apples, and chop them into bite-sized chunks - I make them about the size of the end-joint of my thumb, but however you like (just not too small, or they will mush up). Toss with sugar and cinnamon, and pat them evenly into a lightly canola-spritzed baking dish A 1.5 quart cube-shaped baking dish works really well for this.

In a medium mixing bowl, combine the dry ingredients of the topping with a fork. Add the melted butter all at once, and stir like mad to ensure that the oat mixture gets thoroughly coated with the butter. There should be no dry or floury-looking bits, so keep stirring until it all comes together. If you absolutely have to, add another tablespoon of butter (you shouldn't need to). If you press a bit of the topping between your fingers, it should clump in a crumbly sort of way.

Scrape the topping out of the bowl onto the apples. Spread it out to evenly cover all of the apples, and press lightly with your fingers to help create a surface-crust when it bakes. Don't press too hard, or you'll compact the topping into a dense wodge that is tasty, but less texturally pleasing. Note that you can fill your dish right up to the edge, since the apple crisp will "settle" a little as it bakes.

Bake uncovered at 375℉ for 40 to 50 minutes, or until the topping is a dark golden hue and has sunk down in the dish slightly. It might be a bit darker on the edges - that's okay. Allow to cool at least a few minutes before serving (but it is plenty delicious at room temperature, or chilled, too). Serve on its own, or with ice cream (or whipped cream) or coconut yoghurt. Totally up to you.

In other good news, as touched on above, you can make these pretty much any size you like. You'll want to adjust the oven time somewhat, especially if you have an extra small or extra big one. I made a little, bento-sized one in a silicone baking cup along side the larger one, just to see how it would turn out. I pulled it from the oven at 30 minutes, and it was just right. Here's a closeup:


I didn't really have a bento planned to go with it, so I made an ad hoc bento that I thought turned out pretty well: a Shichimi tōgarashi onigiri from the freezer (microwaved for one minute to revive it); some fresh-cut radishes and cucumber half-moons; ham-wrapped cheddar batons, and a snowpea salad with ginger & rice vinegar dressing (the red bits are bell peppers). And, of course, the mini apple crisp! There was supposed to be a few frozen blueberries tucked in around the apple crisp, in true bento-stuffing tradition where empty space is anathema, but I was running out of time and shrugged it off.


This looks like it might not be a lot of food, but in fact it was quite filling. More importantly, it was an absolute delight to have a little, guilt-free dessert at lunch time. Most importantly, I suppose, from bento standards, everyone who saw it thought it was the most adorable thing ever. I was pleased that the apples had not completely mushed out (in part a function of the type of apple I used), and I was really quite thrilled that making individual sized apple crisps really didn't take more effort than a single larger one. This makes the apple crisp a dessert more suitable to dinner parties than I had previously expected.

As a final note, I want to mention a delicious variation on apple crisp which I first made a number of years ago, and which is incredibly simple. All you need to do is shake a handful of frozen cranberries into the apple mixture, and give it a good stir. Instant holiday fare!